
Posts and Projects:
If you plan on keeping your Impreza for a long time and want the absolute best for your engine, a bypass filter might be a worthwhile upgrade. Typically, these are installed in large Diesel trucks to extend engine life, but they work just as well in small gasoline powered cars like the Impreza.
A bypass filter works together with an engine’s full flow filter to provide high efficiency filtration. Where a full flow filter may filter particles down to about 25 microns, the Amsoil EaBP90 will filter down to 2 microns. Because the bypass element is much more restrictive than a standard oil filter, it can only accept 5-10% of the engine’s oil flow.
Bypass filters can be plumbed into an engine’s oil system in three ways:
- Oil is sourced from a passage in the block or head, passed through a restrictor and returned to a low pressure area of the engine.
- A sandwich adapter is installed between the full flow filter and engine. This feeds the bypass filter which is installed in a remote location.
- A spin-on adapter is used which relocates the full flow filter next to the bypass filter.
In my opinion, the first option makes for the cleanest, safest and least expensive installation, though it’s the most difficult. That’s what I’ll cover in this post.
Parts required
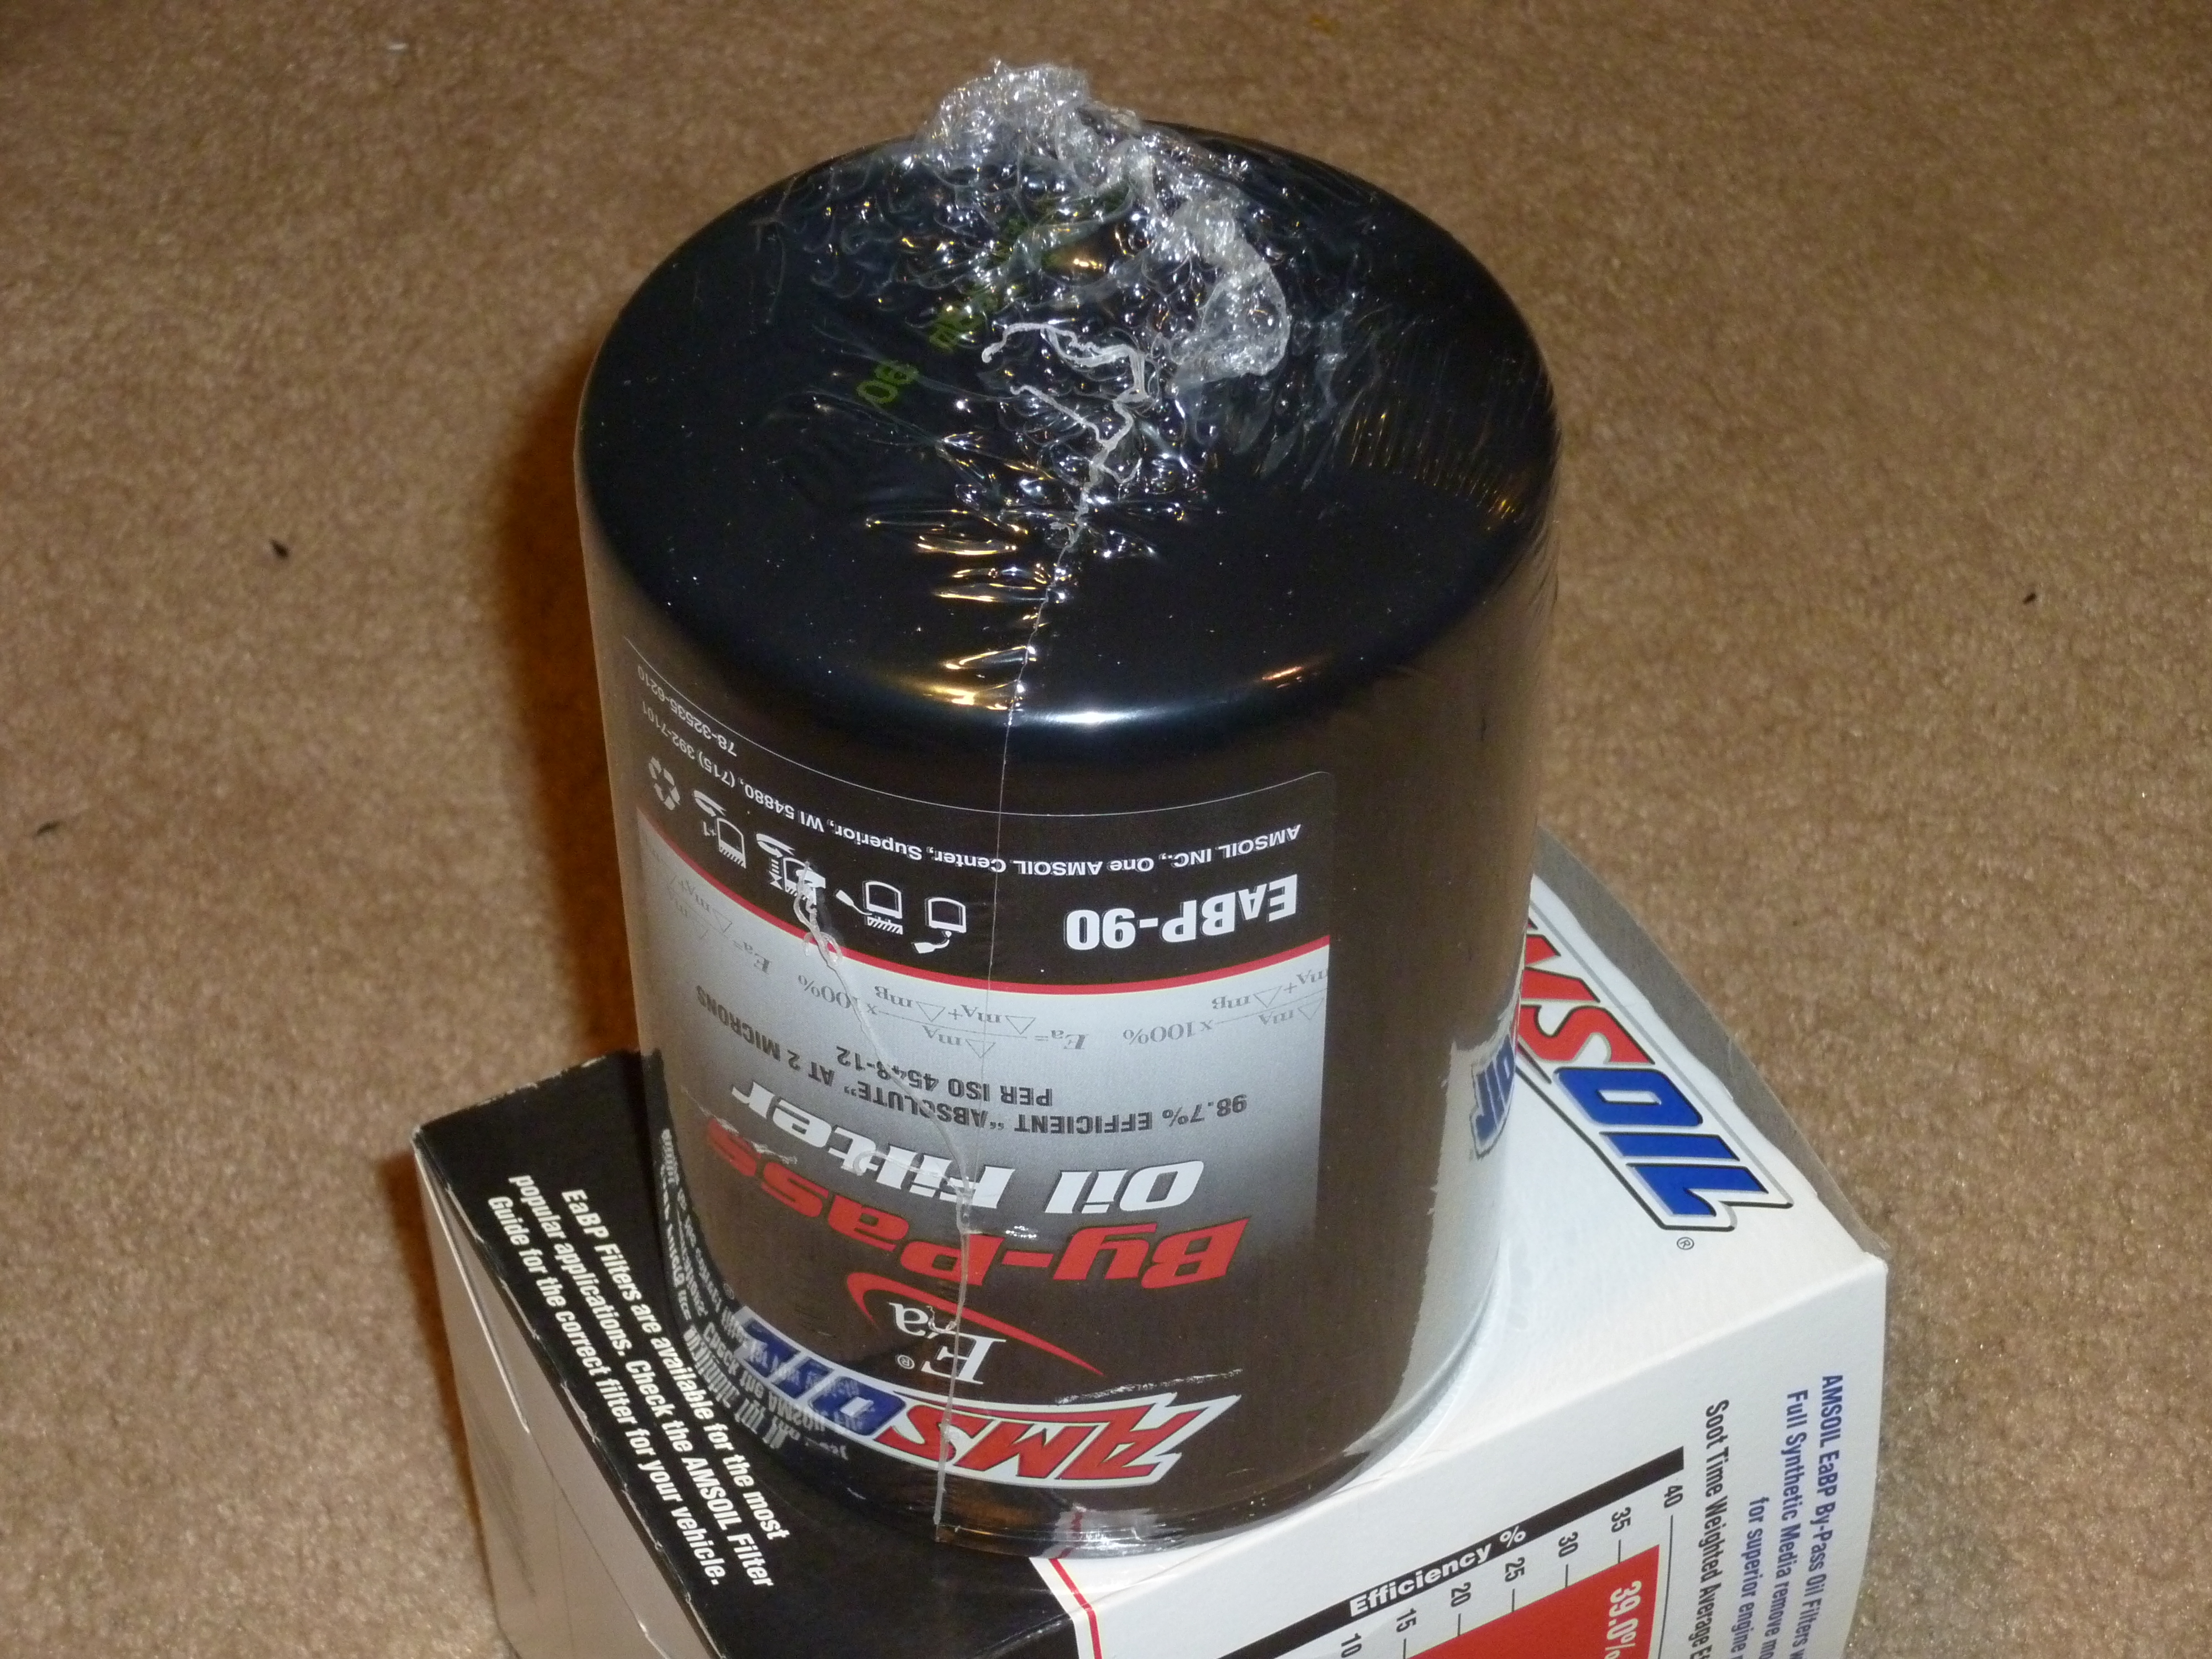
1. Amsoil EaBP90 filter – These cost about $35, last 60K miles and can be obtained from any Amsoil dealer.
2. Filter mount – This is what the EaBP90 will thread on to. An eBay seller offers a mount for the EaBP90 which is a standard filter mount with a custom thread adapter.
3. -4AN braided Teflon hoses – Anything larger in diameter is overkill and may become difficult to route.
4. AN to NPT adapters: 2X -4AN to 1/8NPT (hose to engine), 2X -4AN to 3/8NPT (hose to filter)
5. Hose fittings: 2X -4AN straight, 2X -4AN 90 degree
6. 1/8-28 BSPT male to 1/8NPT female thread adapter – This converts the oil port in the cylinder head to 1/8 NPT.
7. 0.035″ 1/8NPT restrictor (McMaster-Carr 2712T44) – This is a very important part which limits the flow of oil leaving the engine. It’s threaded into the BSPT to NPT adapter. It ensures that the engine always maintains oil pressure through the first start when the lines and filter are empty. Even in the event of a leak, the low oil level light will give enough warning to shut down the engine before damage occurs. The restrictor also limits the flow through the bypass filter.
Installation
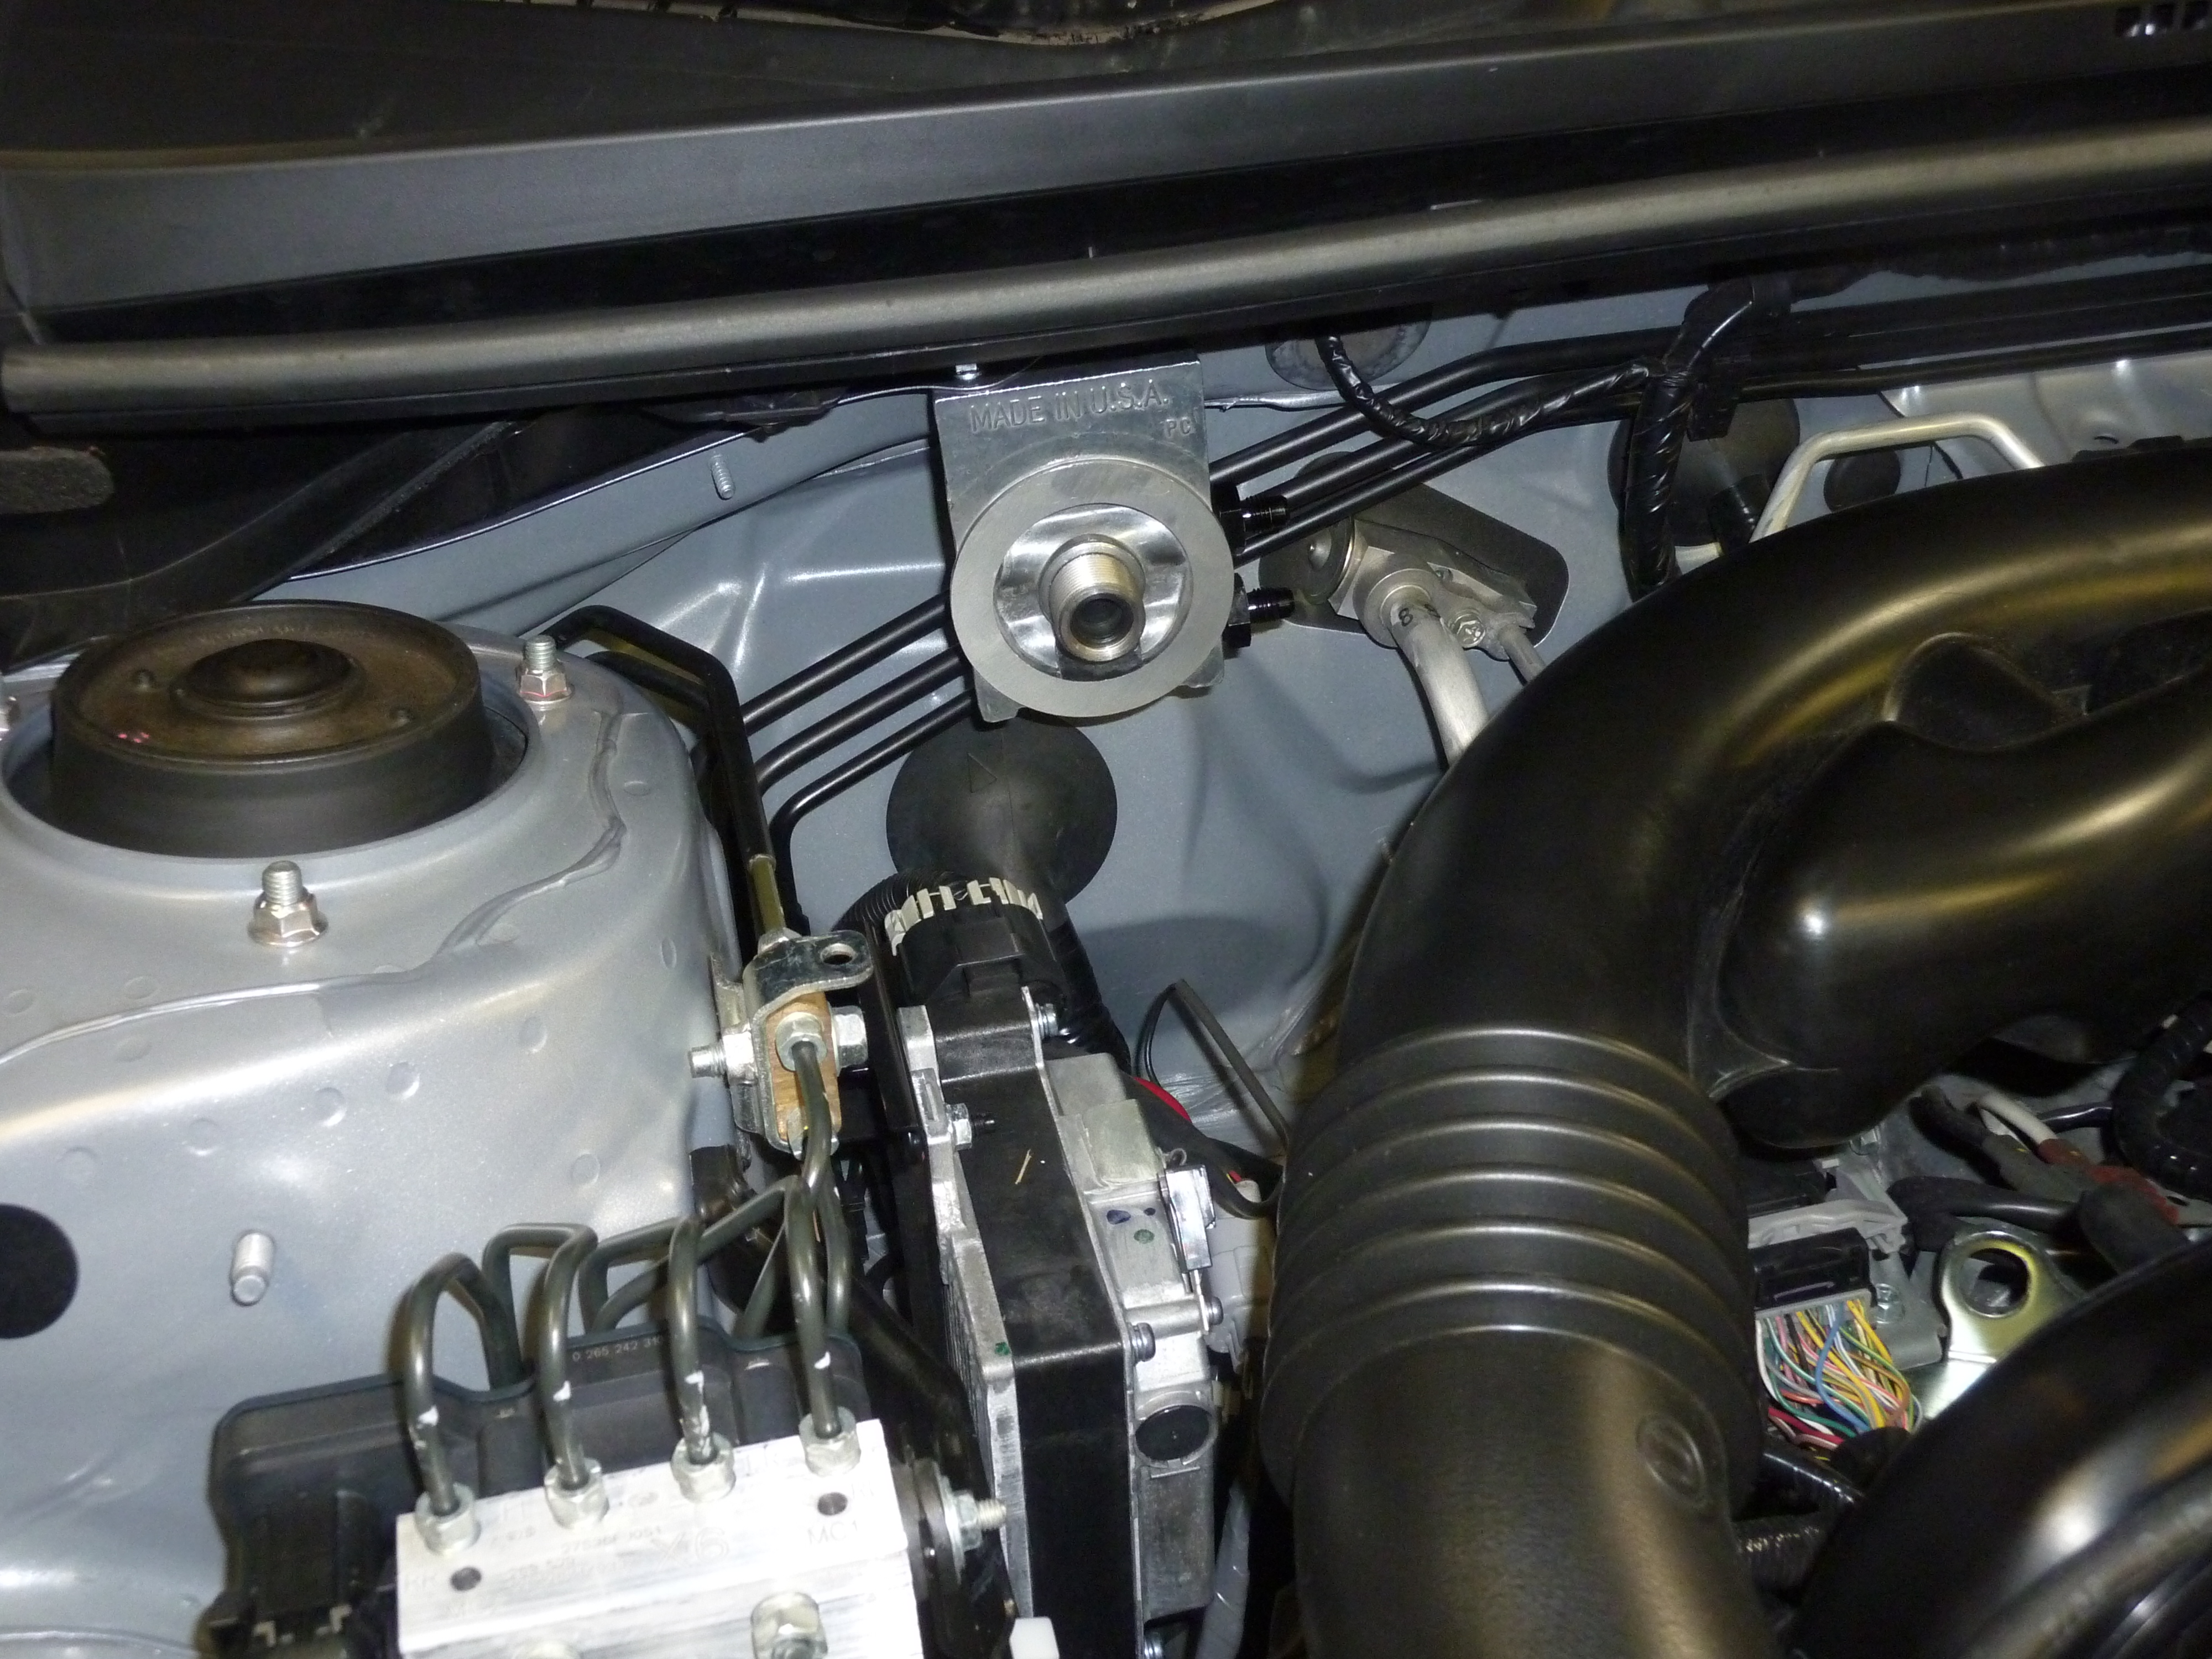
Install the filter mount.
First decide where you want to mount the bypass filter. The Impreza’s engine bay is tight so there aren’t many good places to mount something this large. Behind the right side of the bumper cover is a good choice, however this location is difficult to inspect. On the plus side, it’s possible to mount the filter upright there, which should minimize spillage when it’s time to change the filter. In my case, I plan to unbolt the mount when I change the filter in order to avoid a mess.
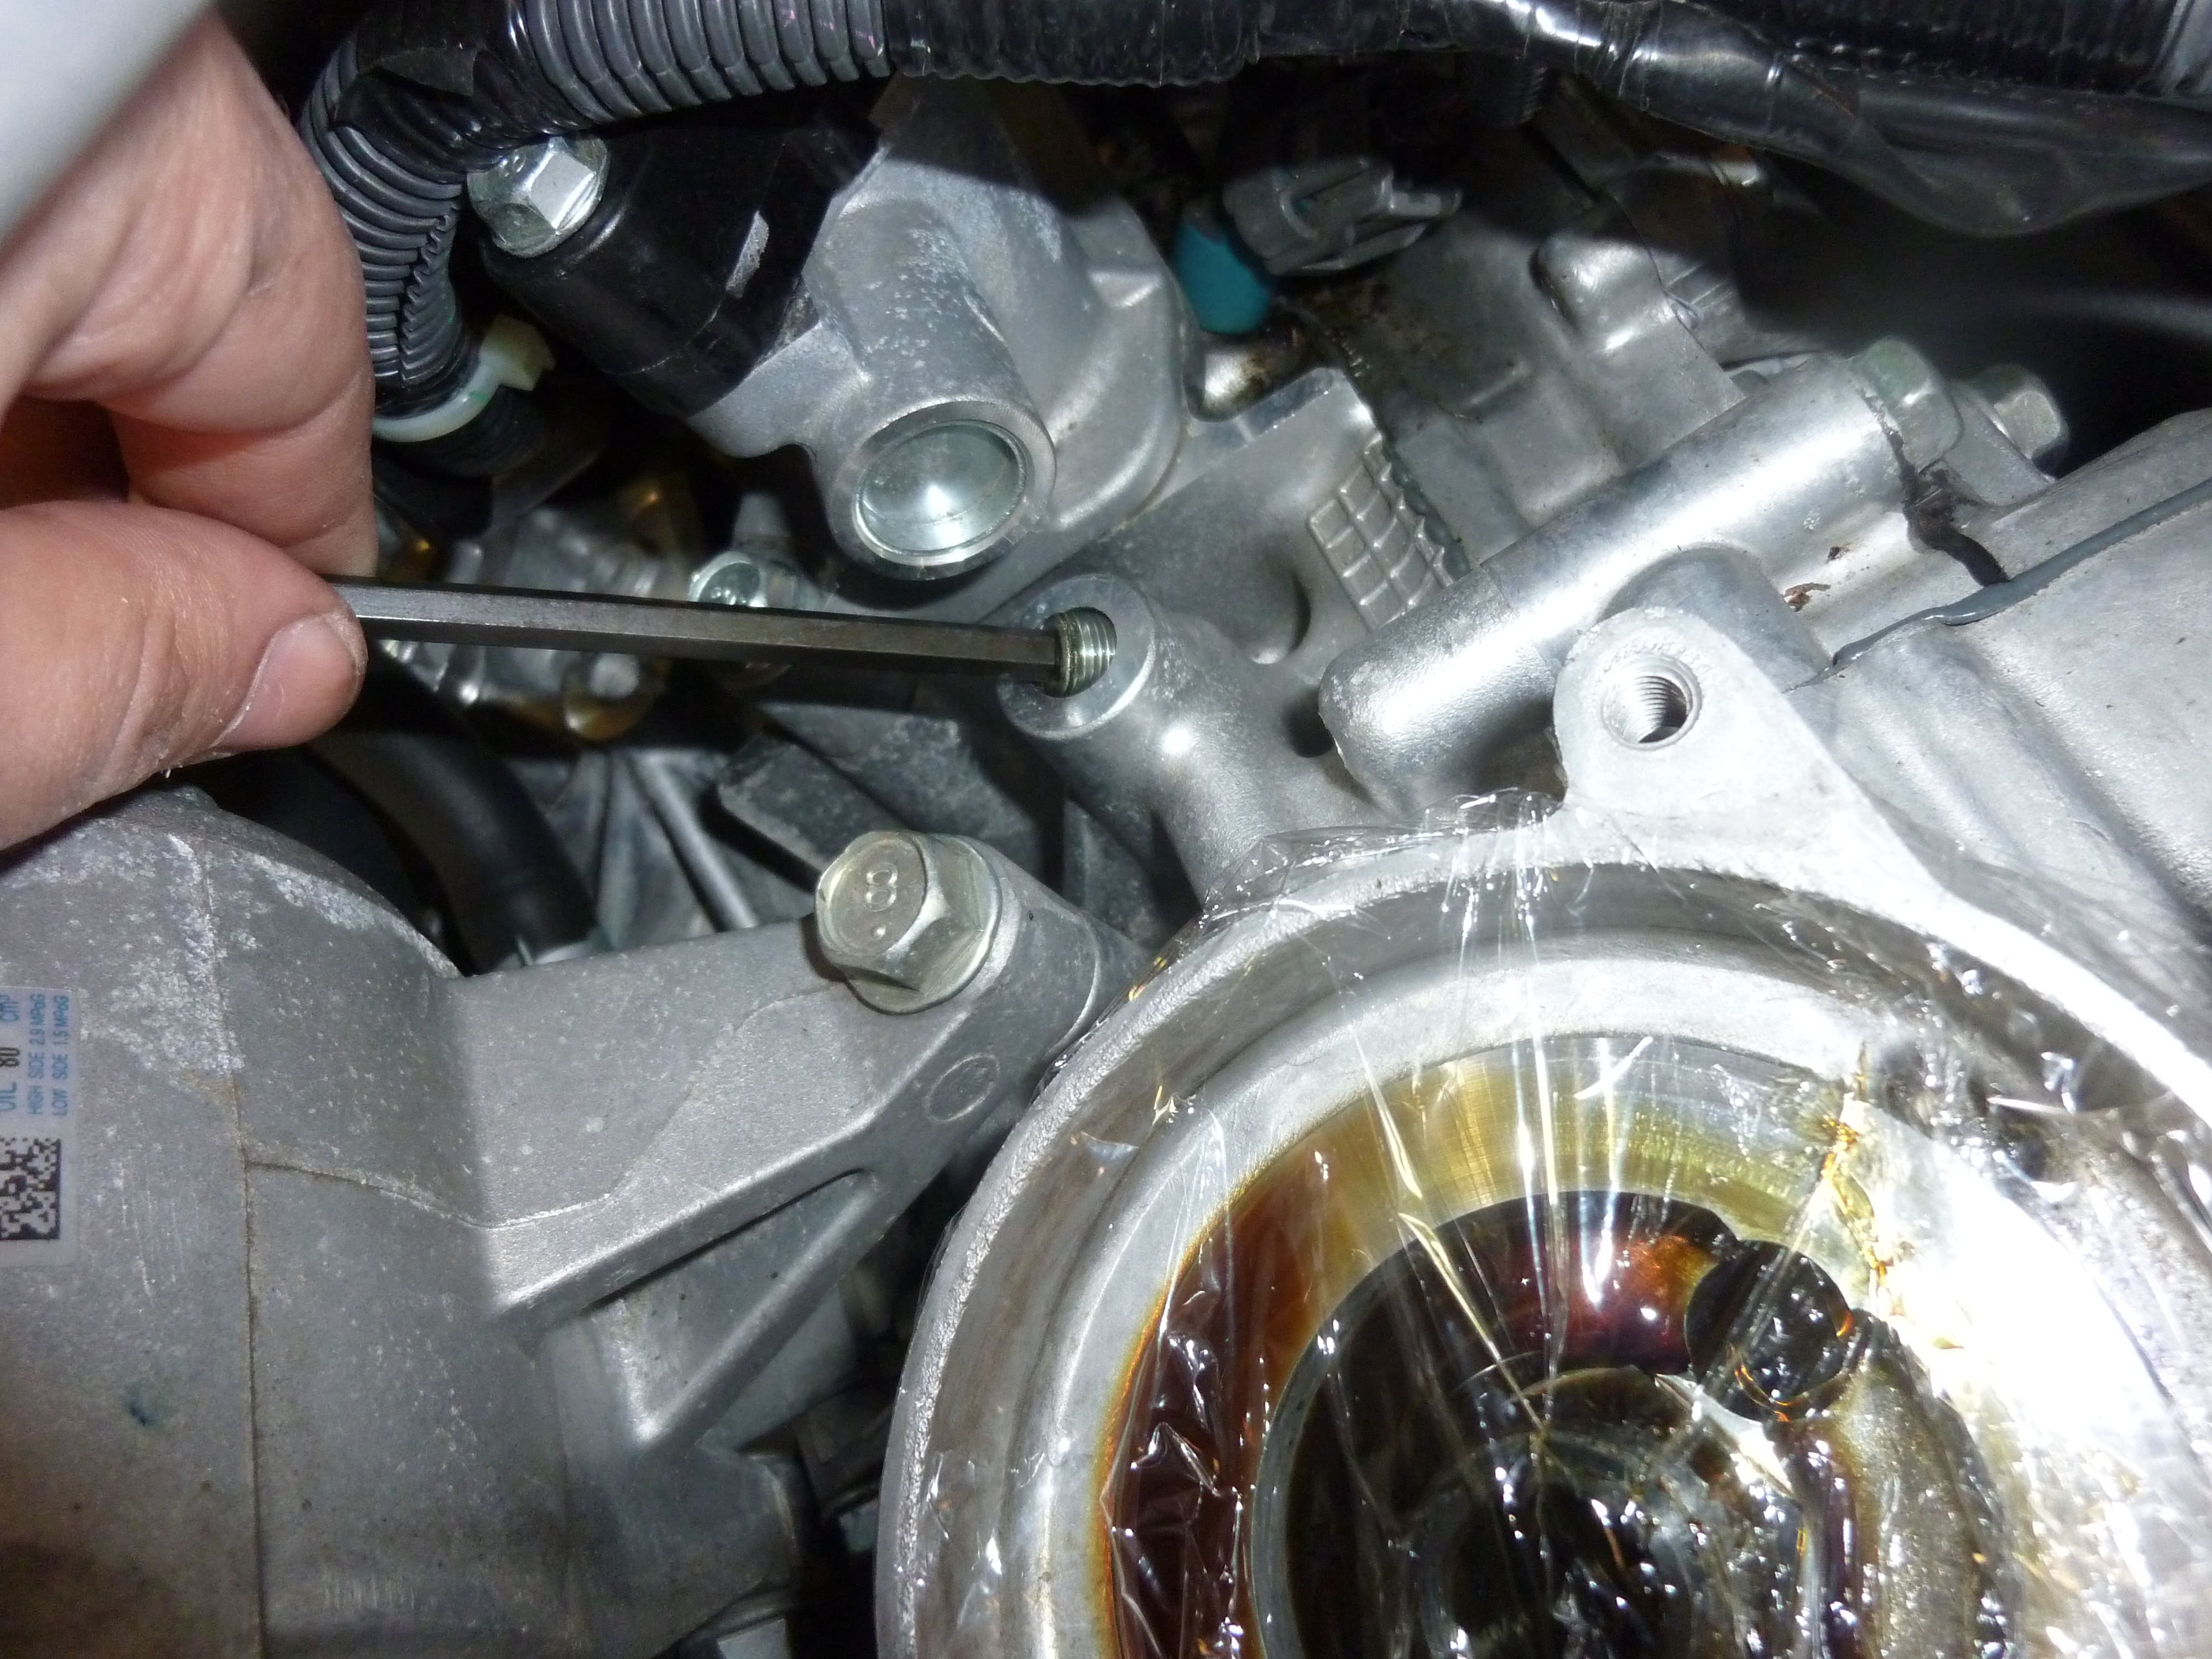
Remove the oil plug in the cylinder head. The thread adapter will replace it.
There are two oil ports on the heads of the FB20. The first is near the oil filter on the left cylinder head. The second is on the rear of the right cylinder head facing the firewall.
If you choose the port on the left cylinder head, remove the oil filter for easier access. Cover the housing with plastic wrap to prevent contamination.
Remove the oil plug with an Allen wrench and replace it with the BSP to NPT adapter. Use a liquid sealant on the BSP (engine) side of the adapter. I recommend a light coating of anaerobic sealant as it will not clog oil passages. If you must use RTV, take care not to apply it in excess as it can harden inside of oil passages.
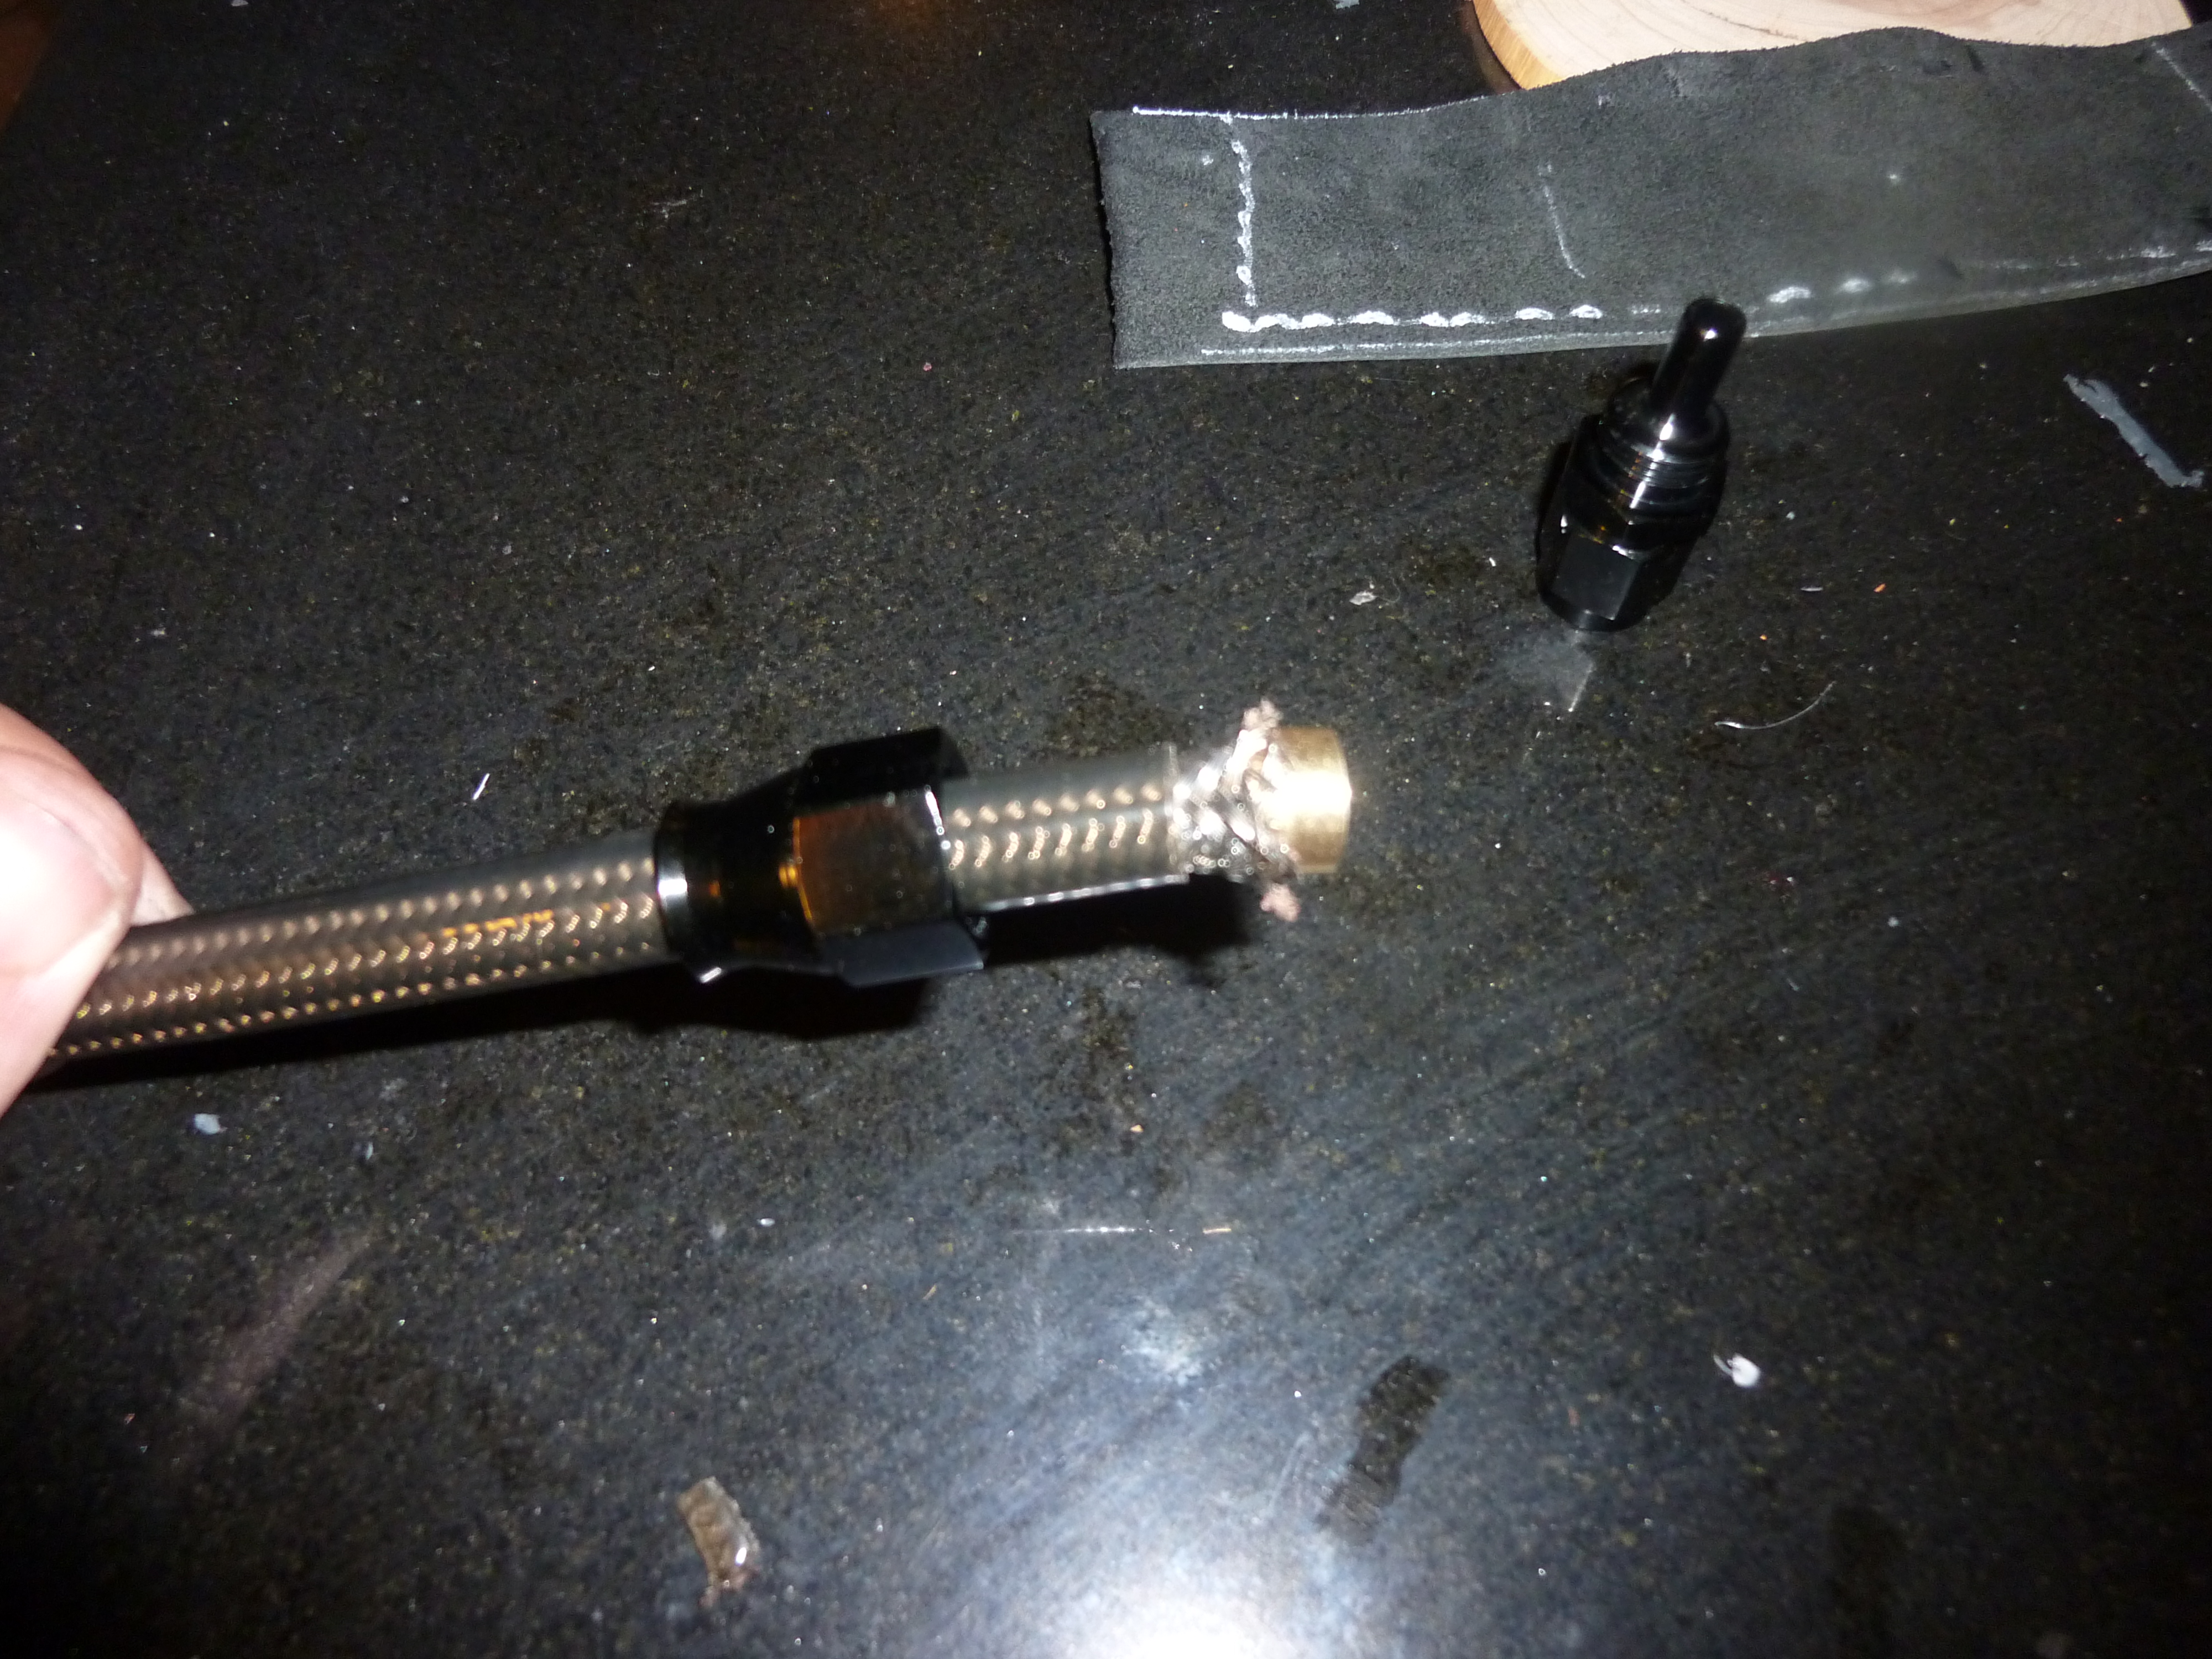
Preparing the hose with AN fittings
Next prepare the Teflon hose that will connect the oil feed location. Route the hose through the engine bay as desired and mark the proper length with tape. To cut the hose to length, wrap it tightly with masking tape. This keeps the steel braid from fraying. Use a rotary tool to cut the hose half way through the tape. Remove the tape, pass the rear half of the aluminum fitting over the hose and flare the braid as shown in the image. Use your rotary tool to trim the braid back about 1cm from the end of the Teflon. Firmly press the Teflon hose over the the barb and thread the two pieces together. Use a pair of wrenches to tighten the fitting over the hose. If your fittings are anodized aluminum like mine are, wrap them in tape to avoid scarring the finish.
The oil feed stack ends up looking like this:
Cylinder head -> BSP to NPT adapter -> NPT Restrictor -> NPT to AN adapter ->AN to hose fitting -> Hose

Terminate the other end of the oil feed line with a straight fitting and a -4AN to 3/8NPT adapter. Thread the fitting into the filter mount with Teflon tape. Half the plumbing is now finished.
Unfortunately, the oil return line is a bit more challenging. There are several ways to accomplish this:
- Modify (drill) the oil cap. This is easy to implement and reverse (buy another cap), but awkward to deal with on an ongoing basis.
- Drill and tap the oil fill tube. A bit harder to implement; shove a rag smeared with petroleum jelly into the fill hole to catch metal shavings.
- Remove and tap a cam cover. This is the most difficult option, but doesn’t interfere with the oil cap or risk introducing shavings into the engine.
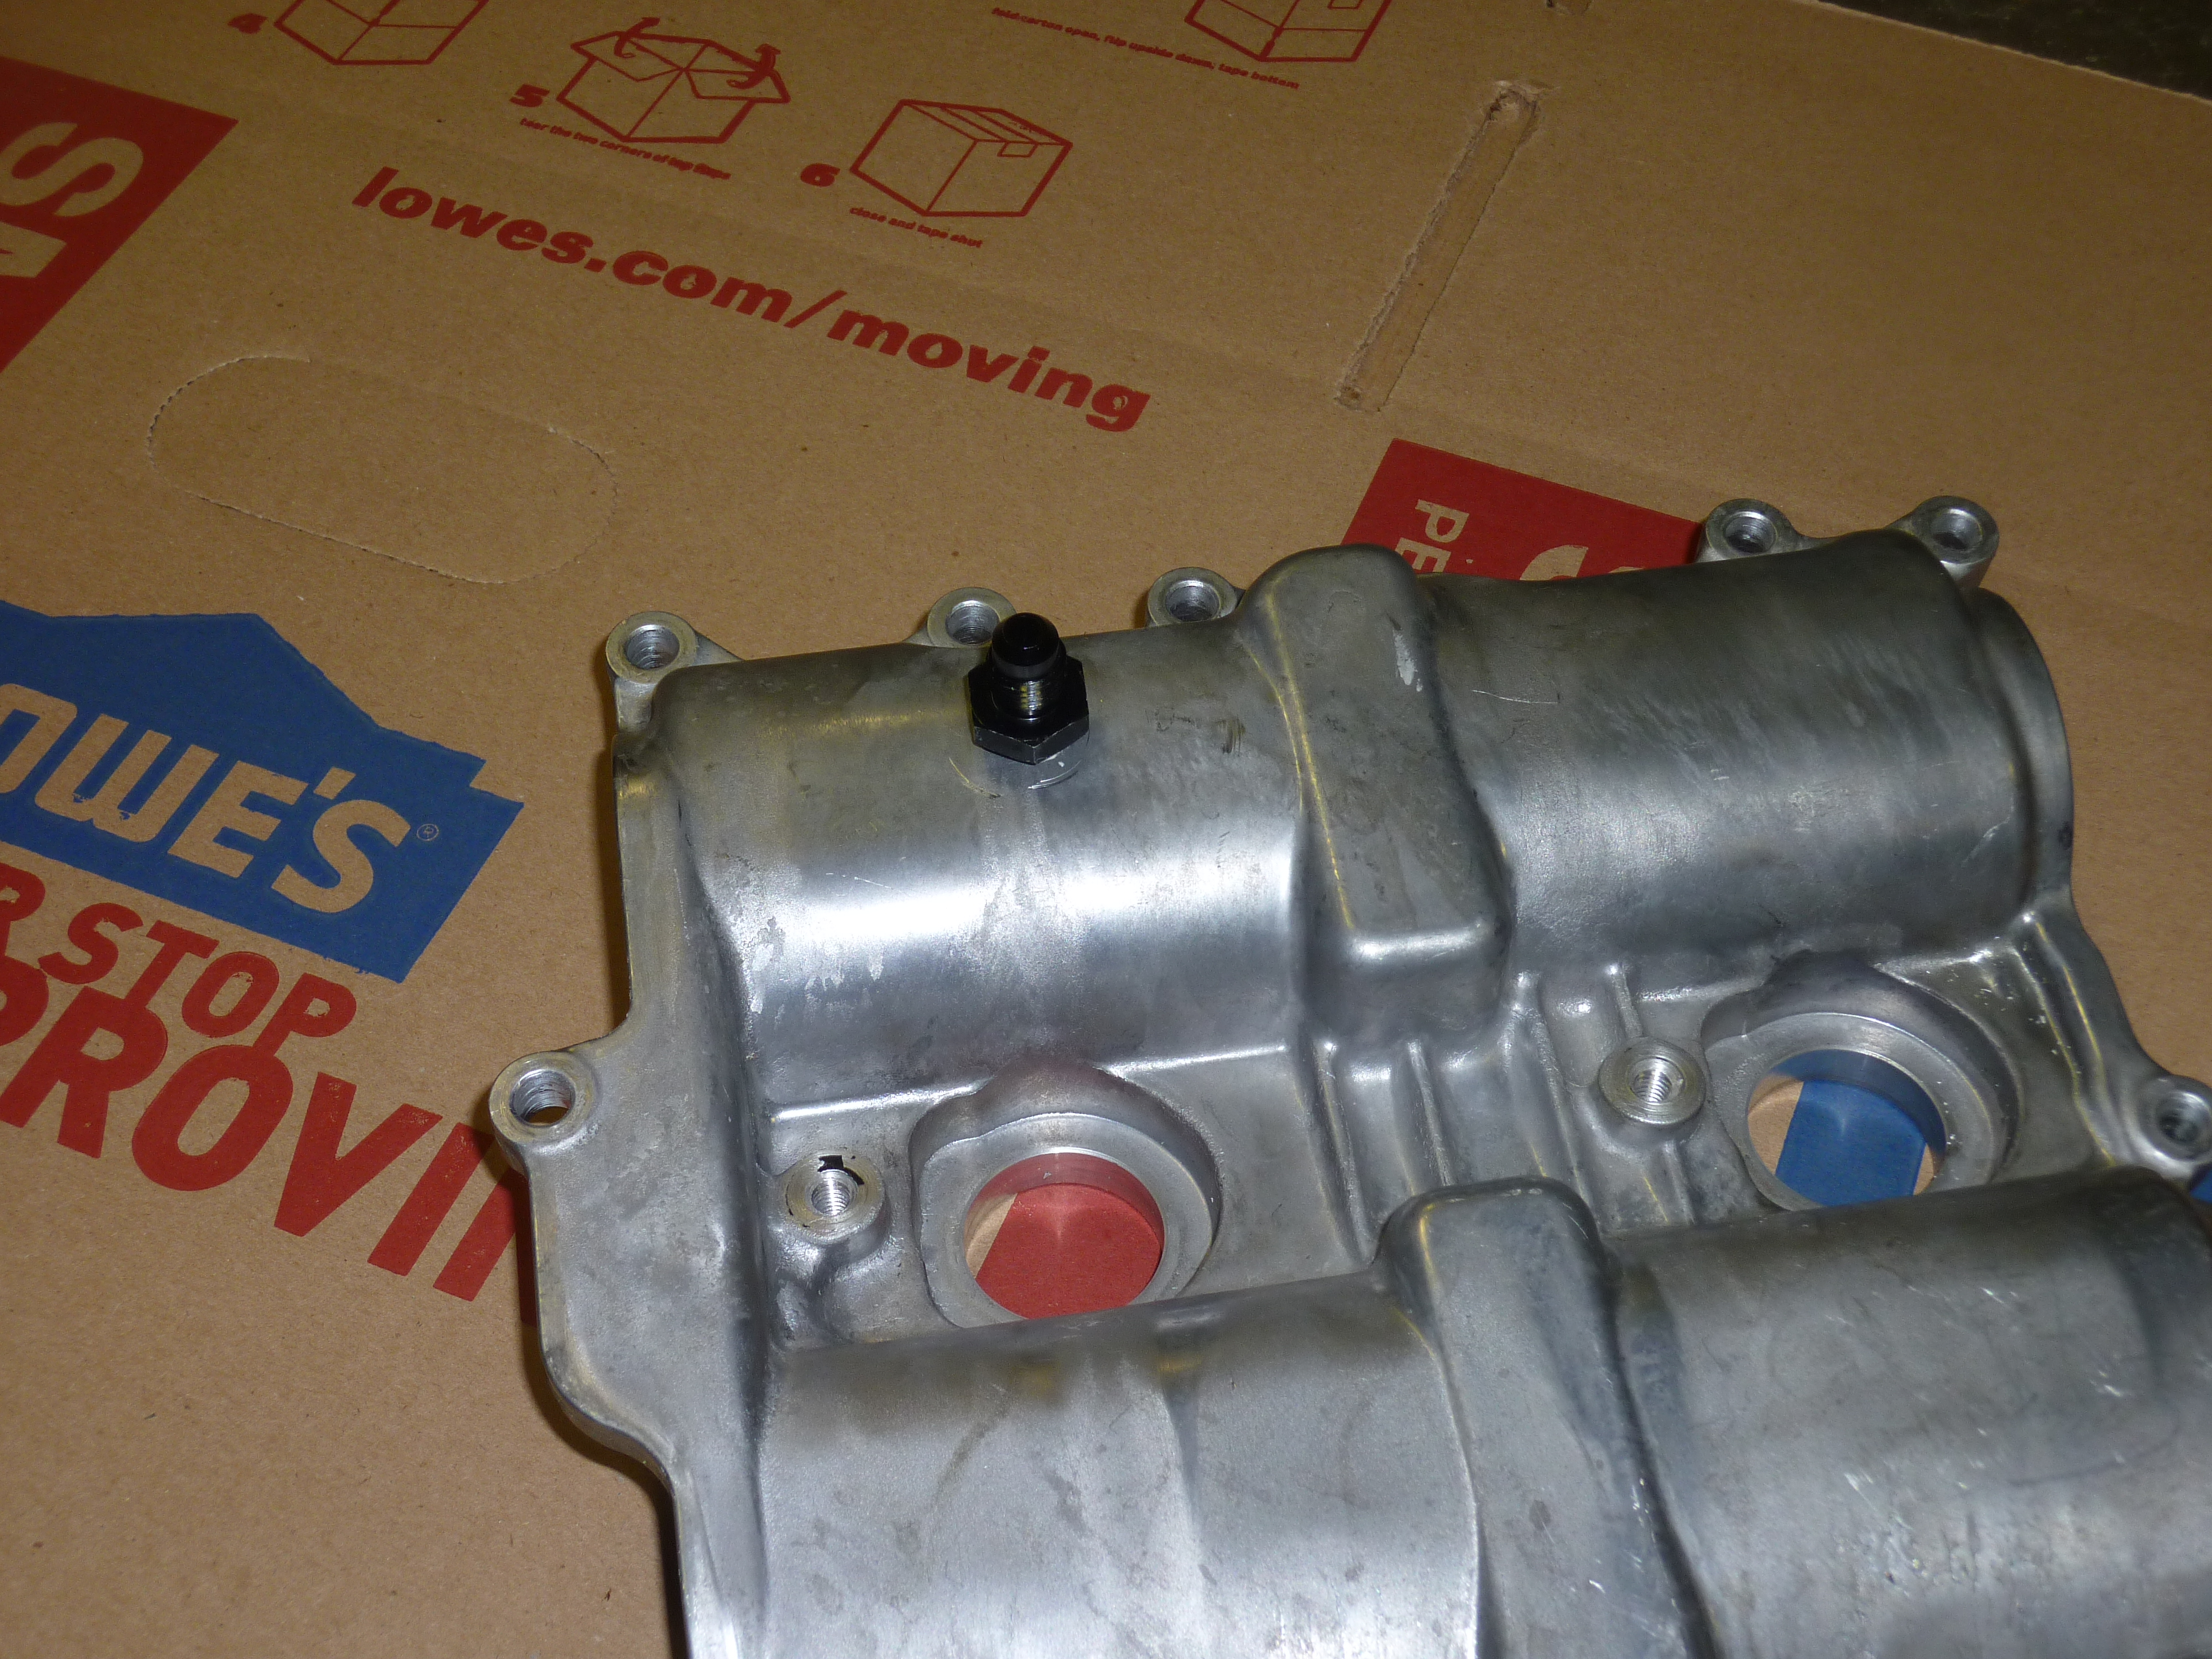
I chose the third option:

A well maintained FB20 at 30K miles, raised on a steady diet of Mobil1.
Pay attention to the location of the cam lobes when choosing a place to drill the cam cover. Tap the cover for 1/8NPT and install the aluminum AN adapter with sealant on the NPT side.
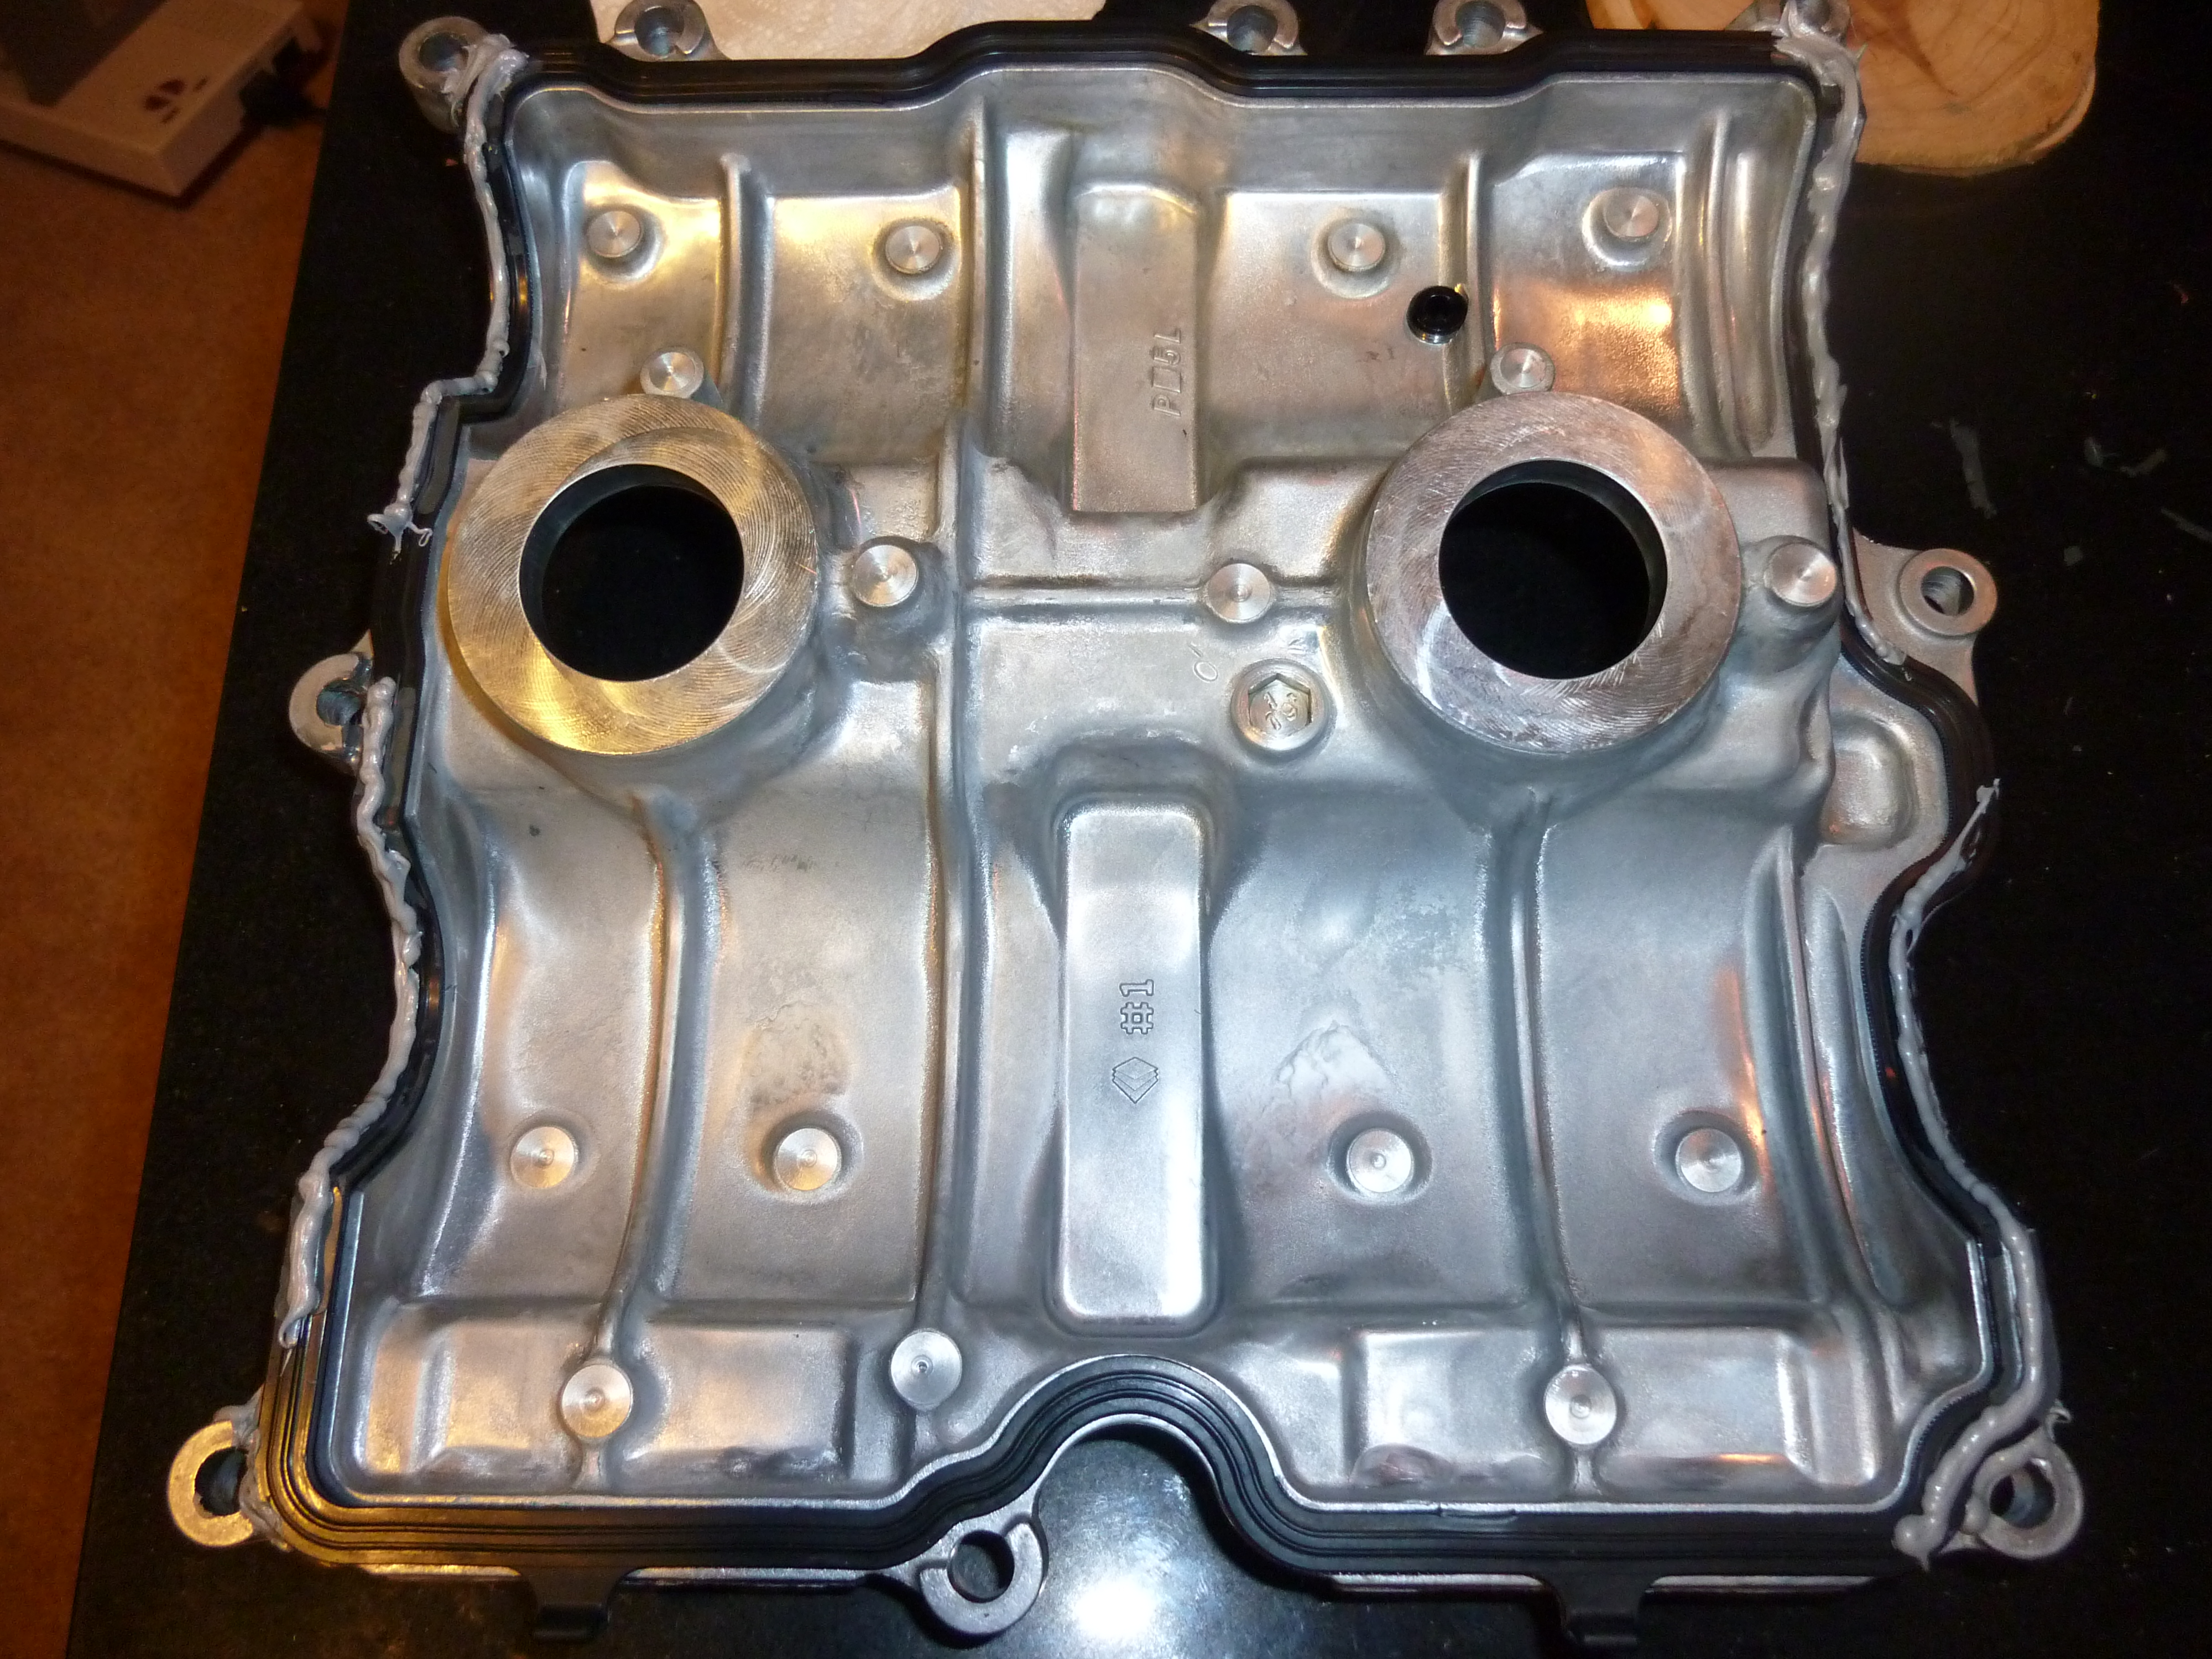
Applying sealant to the cam cover
Scrape all the old sealant from the cam cover and carrier. Clean any oil residue from mating surfaces using a rag soaked with brake cleaner.
Apply Permatex Grey (or equivalent) to the cover as described in the service manual. Be careful not to apply excessive amounts of sealant.
Fitting the cover without smearing the sealant somewhere it doesn’t belong is tricky, but can be done with some patience and dexterity. Be especially careful to avoid getting RTV on the cam lobes. Keep a bolt or two handy to hold the cover in place once fitted. It’s best to wait the full curing time before restarting the engine.
The most difficult part of the installation is now over. Prepare another Teflon hose to connect the outlet of the filter housing to the new port in the cam cover, using Teflon tape on all NPT junctions.
Coat the EaBP90’s threads and gasket with new oil and install it in its mount.
Check your oil level because it will be dropping by about a quart.
After the RTV on the cam cover has cured, start the engine.
Check all fittings and the filter mount for leaks and correct as necessary.
After 5 minutes, shut down the engine and add a quart of oil.
Restart the engine.
After about 15 minutes, check the temperature of the bypass filter. If oil is flowing, it should be warm to the touch.
I’ve noticed that the bypass filter can throw off dipstick readings by continuing to drain oil into the crankcase after the engine has shut down. This is probably due to siphon action and the filter’s location being above the return port. I consider the dipstick reading to be fairly accurate at about five minutes after shut down.
In any case, if the low oil level warning illuminates while driving, the oil level is certainly low and oil should be added.

All trademarks cited here are the property of their respective owners